Friday, November 22, 2013

Playing Dress Up

This week has been American Education Week. Our school had a spirit week to celebrate. Consequently, I've almost been late to school every day but today, when I had a workshop and didn't have to dress up. Don't get me wrong--I love a good excuse to wear jeans or pajama pants, but dress up days are a lot more work when you have three participants to outfit! Especially if you wait to make costumes until the morning of. Or one of the turds participants has an extra-difficult week and has to wear "fancy" shoes one day. (Never mind that the fancy shoes were voluntarily worn on green and gold day, not because they were green or gold, but because it was the dresser-uppers idea himself and he may or may not have misplaced one of his regular shoes.)

Here's a break down of our week:

Monday - Reading can take you places. - Dress as your favorite book character. 


Reed was super excited about his idea (after he got over not being able to dress like Clay, a dragon from the Wings of Fire series)... until he got to school and no one knew who the heck he was but the teachers. He was especially perturbed when someone thought he was Santa!

Calvin was equally pumped about his character: a golden samurai. From what book he hails, I have no idea. I tried really hard to talk him out of the three-year-old, coming-apart-at-the-seams (quite literally) Wolverine muscle suit. But he reasoned that if he wore his new, black GI Joe muscle suit, he would look too much like Batman.  The Batman mask is to give him "things like this" on his head, because apparently all samurais have horns...  I pretty much avoided and/or apologized for him all day. 


Tuesday - Turning back the clock on education. - decade day

My fancy-clothes loathers actually went for 1920s garb when they found out they could wear their "cool dude" fedoras. Reed insisted on having a curly mustache and a monocle. I hear they were all the rage in the 1920s... 


They actually liked their get-up this day (I let them wear tennis shoes, even though it bothered me deeply), but you can't tell in any of the pics. I forgot to take their picture until 5th graders were already coming into my classroom. So, I did what any good mom would do. I made them stop and embarrassed the heck out of them before I hugged them and told them to have a good day! 

Wednesday - Be thankful for a formal education - Wear your best dress clothes. 

This was Grandparent's Day at the school, so we wanted to impress. 


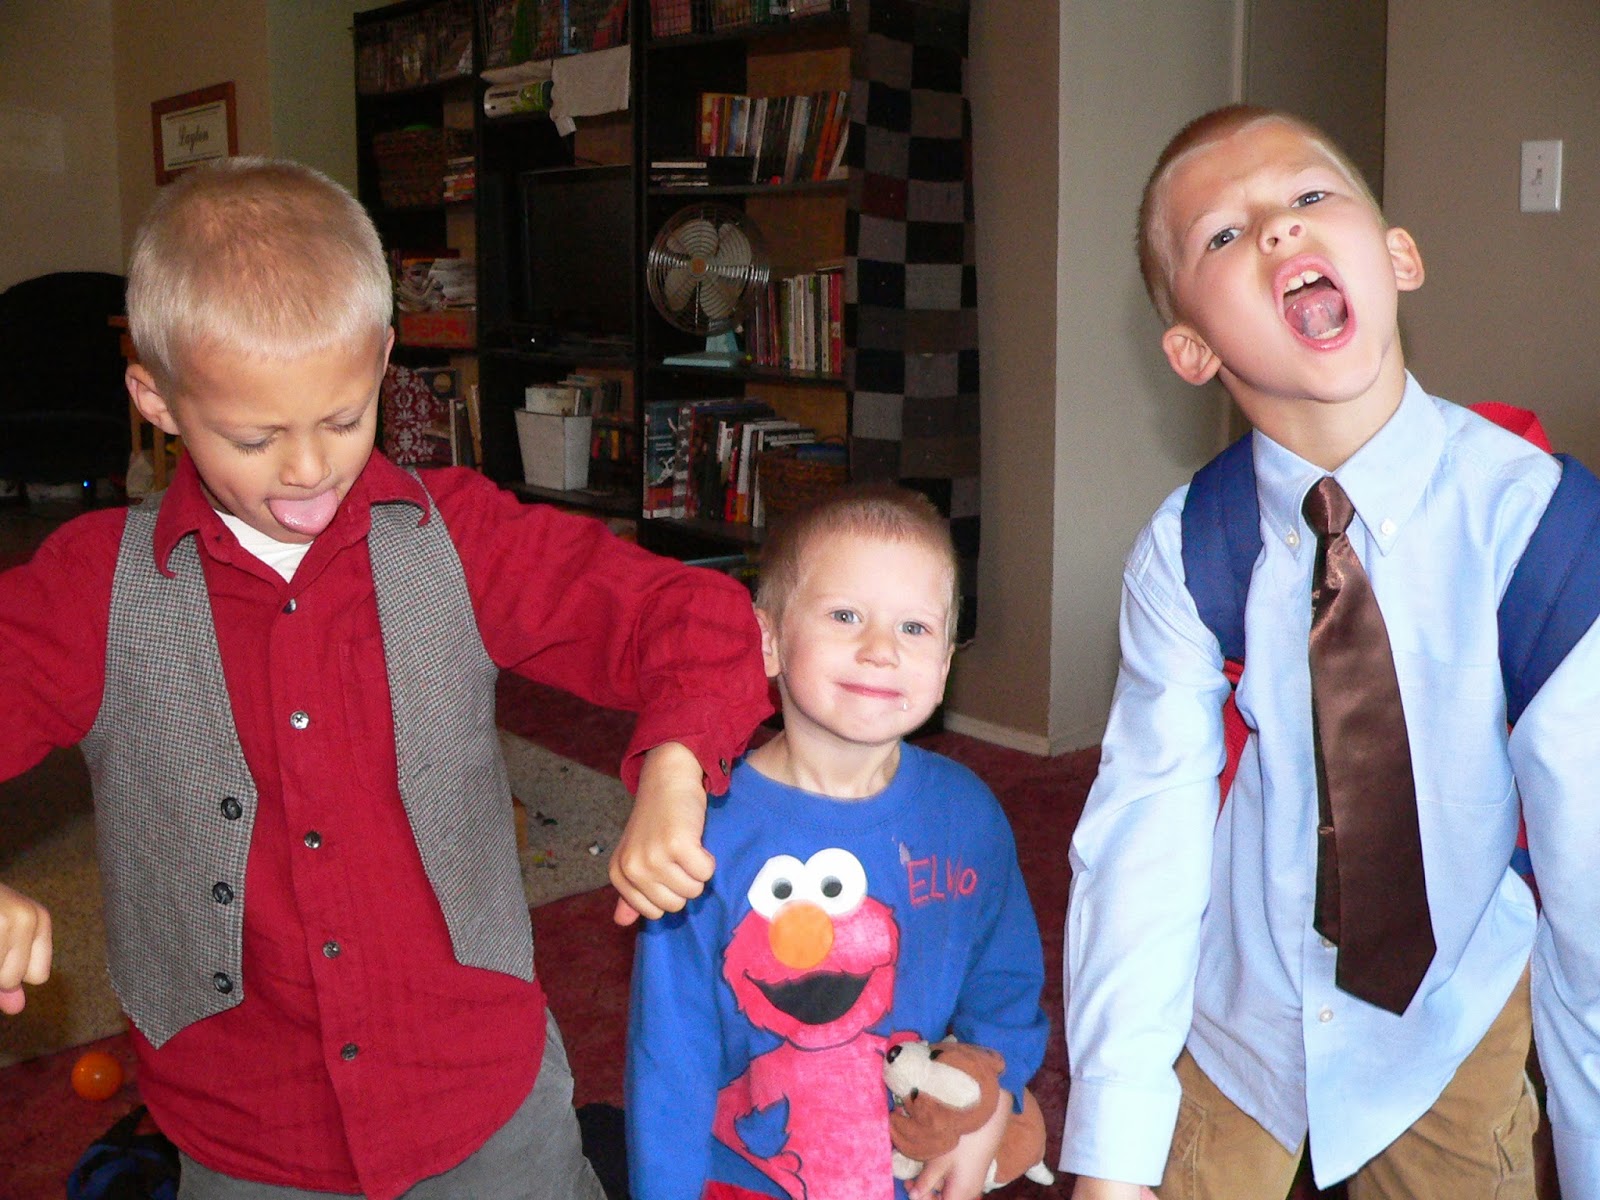
This was not a fan favorite. One person had informed me the night before, "I'm NOT wearing a button shirt," so I didn't try to send him with a noose. Gotta pick your battles with that one. They both wore undershirts so they could pull a Clark Kent at recess.  One even brought spare shoes in his backpack. 

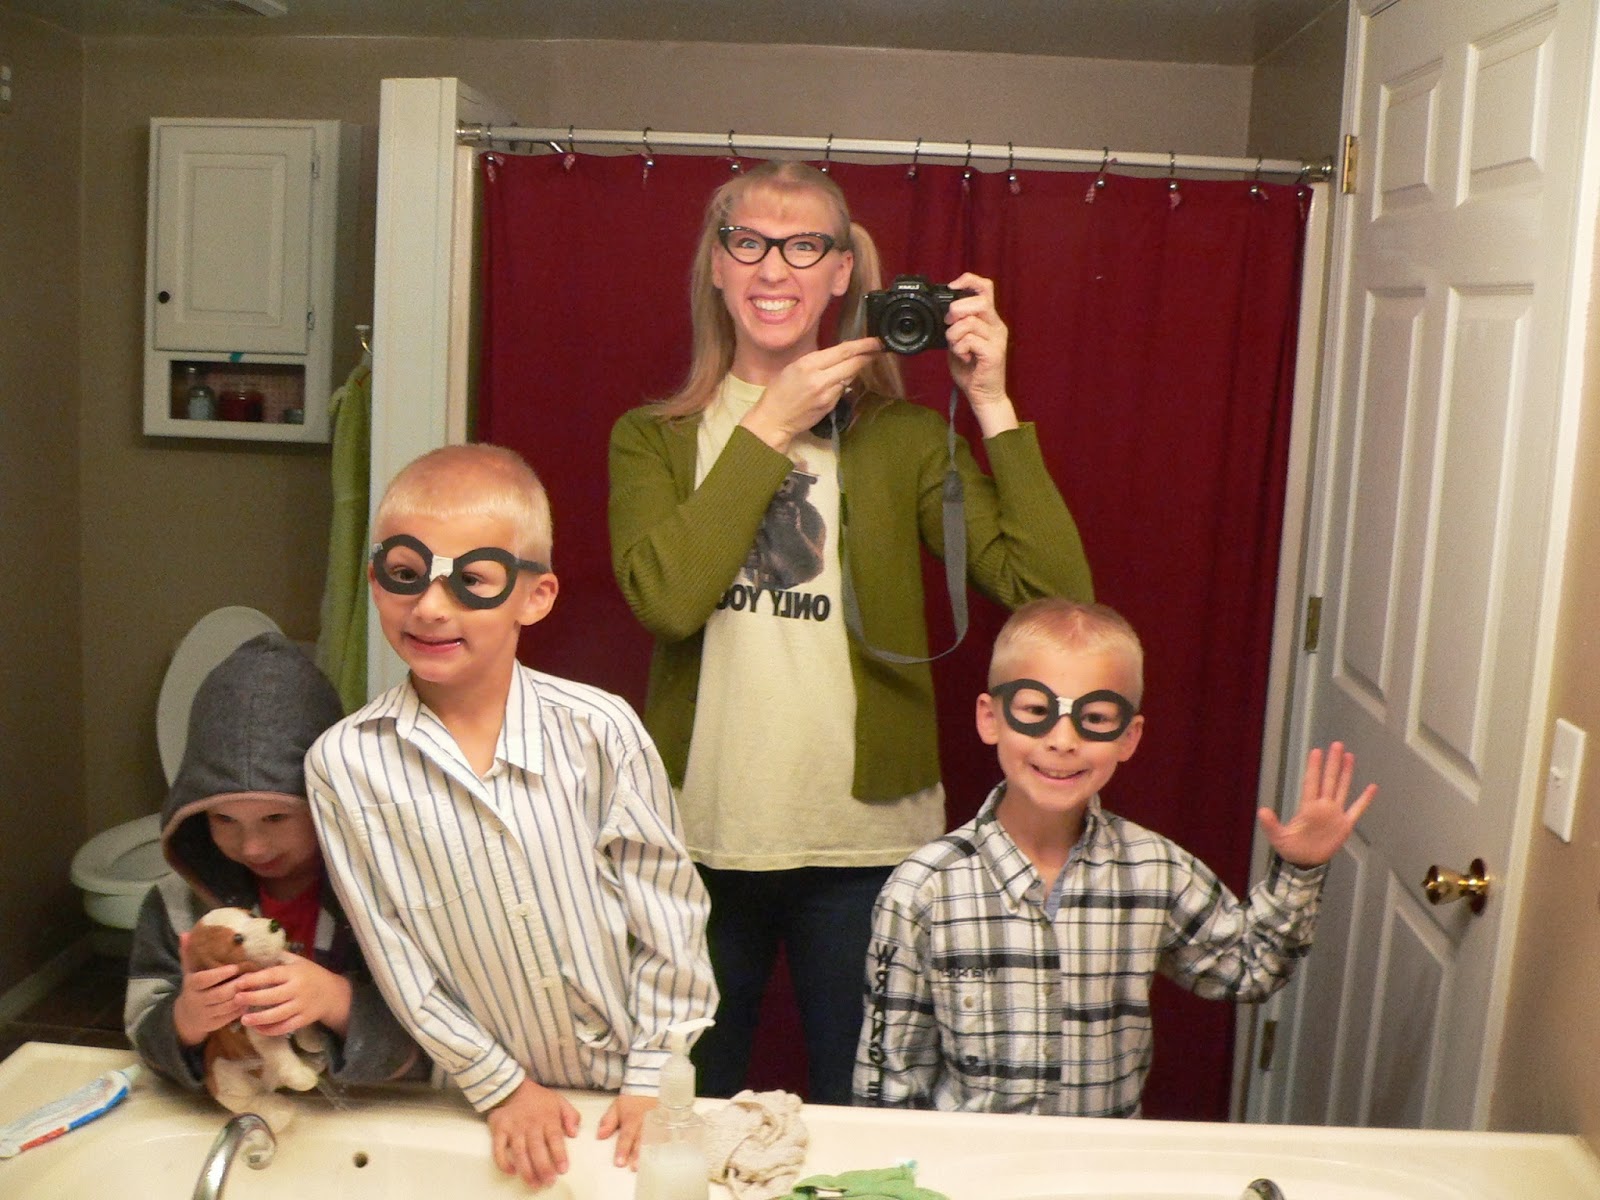
Thursday: You don't have to be a nerd to get a good education! - Dress like a geek. 

Like an idiot, I didn't make those glasses until it was almost time to walk out the door. Like an even bigger idiot, I taught the boys how to talk like Urkel. Already loud voices + (badly impersonated geek x 3) + an enclosed van - adequate time to get to school = full-on obnoxiousness! The only sanity saver was the calculator I let Reed borrow for his pocket. They took turns punching in numbers, fascinated with the results. Then Calvin insisted on borrowing my jumbo classroom calculator, even though it wouldn't fit in his pocket. They played with it after school in lieu of the usual Lego.com games. I guess they really got into character for this day!


Wednesday, November 20, 2013

Craft Nook: The Whole Shebang!

I was gonna do a post on how I designed and installed shelves in my craft nook all by my lonesome, but, really, who wants to see all the details? I used some wood. I painted it. I used a level and other impressive-sounding tools to install them. It took for-e-ver, and now it's done and I love it. The end. Wanna see?


Click on the links for details on how to make the storage containers, decoupaged boxes, pallet desk, crib chalkboard easel, and crib springs bulletin board.

The kicker? The whole shebang only cost $122!!

Shelves:
   Corbels                      $ 34
   1x2" Support wood   $ 19
   1x12" shelf                $  9
   1x8" shelves              $ 14
   Paint, screws             on hand

Desk:
   2 spindles               $10
   1x8" boards            $15
   1x12" board           $ 11
   1x2" apron wood   $ 2
   Mending plates        Can't remember, but they were pennies each
   Pallets                     FREE
   paint, screws, stain  on hand

Jars:
   chalkboard contact paper     $ 8

GRAND TOTAL - PRETTY STINKIN' GOOD!!  (Unless, of course, you count the labor... But I thoroughly enjoyed most of the man-hours it took, so I don't count it!)

Linking up to Kammy's Korner Trash 2 Treasure Tuesday
                      Hunt and Host Laundry and Craft room linky party

Tuesday, November 19, 2013

Crib Springs Bounce Back


This summer, I officially said goodbye to baby-dom by tearing apart our crib and turning it into a chalkboard easel. But I'm not one to waste a perfectly good industrial looking thingamajig and the springs just looked so fun, that I had to perform another transformation. This one was pretty simple.

I had to remove the hangy on the frame rod thingies first. (Sorry, I have no idea what the technical terms for crib parts are...)


It was stubborn, but so am I. I had to pry out a piece of metal with the hammer tines to make enough room to force out the rod. Then, I just hammered the pried out piece.

Note the ever-present backdrop of Legos


Then, I just had to mount the sucker on the wall and hang a few items with clothespins.


I also have put one of the crib railings to use--sorta. It's leaning sideways in our bathroom as a drying rack. Actually, it's supposed to be a place for Ryan to drape his pants that aren't dirty enough to wash, but are too dirty to fold back up and put away. One look at our closet floor will tell you that it is not being used for its intended purpose, though. Today, Max asked me if it was our ladder. Yep. A ladder to nowhere, apparently...

Check out the whole craft area here.

This craft linked at Kammy's Korner

Monday, November 18, 2013

Pallet desk


Yippy, skippy! I made furniture! By myself! And it was mostly free! I started with four or five sets of pallets, free from the local hardware store. Ryan helped me saw them about in half with a skill saw (but just for the record, I learned how to use the skill saw later and I totally coulda done this step by myself!)


All of the pallets got a heavy sanding and a whitewashing with watered down wall paint. 


This process took several days this summer, and life went on. This is what the nublins did while mama was cutting, cleaning, sanding, and painting. 


Then, I simply stacked the pallets on top of each other for the left half of my desk. 


For the top, I used two 1x8" and a 1x12" board.  I dry brushed them with red craft paint, sanded, then used a mixture of stain and black craft paint to make it look like weathered barn wood. I was thrilled with the results, though the pictures don't do it justice. 

The bottom board is unsanded

I brushed on the stain/paint combo, then wiped it off with a rag. The top board hasn't been wiped yet.

I made a wood "apron" to go around the edge, but only the front and sides. I also used scraps from the apron to help hold the three boards together.


Those metal pieces are called "mending strips" and I thought about them when I looked up in the rafters of our shed. They're used to hold trusses together, but they work for slightly shoddily-crafted desks as well. I used two stair spindles for legs.  


The pallet slots are perfect for all my scrapbook papers, maps, and vintage newspapers. I have stove drip pans for "drawers," but they're pretty flimsy. I'm thinking jumbo cookie sheets would be perfect, but they're not in the budget right at the moment. 


And the desk is an adorable, practical addition to an unused corner of our bedroom, all for under $40! 


Check out the whole craft set-up here.

Linking up to The Shabby Nest


Sunday, November 17, 2013

Decoupaged Boxes

My sister was cleaning out an attic somewhere a while back and came across stacks of local newspapers from  the 50s. Who did she think would want to do some dumpster diving vicariously through her? Me, of course. I've got to admit, I've hardly used any since then, but not because I don't love it. On the contrary, I love it so much that no project seems worthy of using it up. Until now. One of my craft nook ideas was covered boxes. A workplace dumpster dive resulted in five perfect boxes. They were large and shallow - almost like board game boxes, but much sturdier. I mixed up a batch of homemade Mod-Podge and got to work. Using the newspaper like wrapping paper, I smeared glue under and then over it. Once it dried, it held very well, and most wrinkles worked themselves out.


I had planned on putting them back together as boxes with lids for storage, but they looked so adorable I wanted more! I stacked all five bases on one pile and all five lids (very slightly larger) on another. I had to fill them up to the brim to keep them from sliding down inside one another, but I had so many odds and ends to store, that was no problem. Now I have twice the impact, twice the storage, and I love it!


Check out the whole craft nook here.

Linked at Kammy's Korner 

Saturday, November 16, 2013

Cute, Almost Free Storage

I've been pining for and pinning craft room ideas for a few years now. I'm proud to say I finally have it. It's more of a corner, really, but I'm in love. And I'll show it all in a few days, but first some of the details.

I have a lot of random craft crap. Some of it is cute, some, not so much. So, for about two years I saved oatmeal containers and spaghetti and baby food jars. The oatmeal containers were simple to transform. I just peeled of the label, added new ones of old newspaper, maps, and scrapbook papers. I decided to make the new labels much smaller to let the Kraft paper-looking cardboard show through.


I also cut circles to fit on the top. I may still add chalkboard labels somewhere, because I crammed so much stuff in those tubs and I already forgot what all's in there.


The jars were probably the biggest hold up. I thought I could remove the sticky label glue with hot water and scrubbing, but that didn't work. I finally discovered dipping them in a pot of boiling vinegar. Worked like a charm. My awesome sister-in-law used her Silhouette machine to cut out cute labels in three different sizes. She used chalkboard Contact paper, so the labels peel off and stick on easy peasy. A whole roll was less than $8 and she made a ton of labels for me and still had paper left for herself (she was eyeing her pantry last we talked)


I spray painted the jar lids red. The baby food jars look great, but the large lids ended up pretty streaky. The unlidded jars look ok, but don't want to deal with dust, and I prefer the jars with lids, so it looks like I'll be hoarding pasta lids again.


And then there are these babies:


I scored them for FREE this summer at the grocery store on a double-fortuitous day. The only problem with these bad boys were that they made the spaghetti jar sticky-stuff removal look like child's play. I'm not really sure what finally did the trick, but it must've been a combination of soaking in hot water, drowning in vegetable oil, smearing peanut butter over the label, then scraping with a spatula, steel wool, my fingernails, and a scrubby sponge. The plastic was a little scratched up after the process, but I labeled the back side, and once I loaded them up you could hardly tell.  


Check out all the other storage in my craft "room" here.

Friday, November 15, 2013

Random Memories

It's been a wild and crazy first three months of school. Life has gone on in a whirlwind, and blogging has been the last thing on my mind. But I jotted down a couple of memories I wanted to preserve and today unearthed them from under a pile of randomness.


Random memory #1:
Sometime in September, Reed and Calvin were deeply immersed in their world of Lego Starwars. In between surprisingly realistic light saber sound effects the boys were trash talking Jedi-style, Reed in a squeaky Yoda voice, and Calvin in a deep warrior tone.

R: Very strong, they are. Fight them, do not.
C: Yoda! You're not our boss!


Random memory #2:
I didn't write the date, but it was apparently a momentous one:

Reed blew his first bubble with bubble gum.
Calvin read his first book.
Max pooped in the potty!

We've had potty training down pat since school started (God bless you, Mrs. Pam!), but we're still on a poop-training roller coaster. We're close though--down to only night-time and nap-time filling of the pants, and no other diapers! Hallelujah!